Please give full credit to Mosaic Tree if you use this design. Use for personal purposes only.
Beaded watch make - wrist watch with wooden beaded strap on elastic
Instructions
What you need
· Sharp scissors
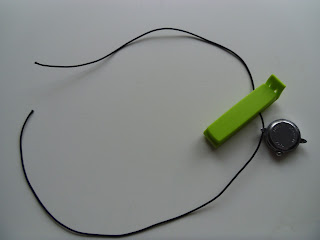
· 2 x plastic clips (eg the ones used for freezer bags) – referred to by their colours (green and yellow) throughout these instructions.
· Tweezers (to pick up small beads)
· Watch face for beading*
· Craft elastic c50cm* (comes in variety of colours on Ebay)
· Shank button (button with loop underneath)
· Selection of beads (c70) in your chosen colour theme* – selection of colours, shapes, sizes (max 1cm in diameter, max 1.5cm length) wooden, upcycled is good!
Warning! Beads can present a choking hazard, particularly for young children.
Keep watch away from water as the colour in some beads may leach when wet.
1. Thread elastic through loop at one end of watch face and secure with green clip.
At the end of this make, you will have 4 beaded strands which form the watch strap.
2. You are now going to start Strand 1. This will be the end of the elastic without the green clip on it.
Thread 10-12 beads (child/small adult wrist), 12-14 (medium size), 14-15 beads (large size wrist). Put 1-2 smaller beads on at end. These will be hidden under the shank button and, if smaller, will be more comfortable for the wearer.
Now thread the end of elastic from strand 1 through the shank button. At this point after the button, Strand 1 becomes Strand 2. Remember that the underside of the watch face will face the loop of the shank button when worn on the wrist.
3. Strand 2 – Thread beads onto Strand 2. Ensure that it measures the same length as Strand 1. If necessary add or remove a small bead to Strand 2 to do this.
4. Thread end of Strand 2 through 2nd hole of watch face. It should be going in the same direction as the elastic in the 1st hole in the watch face (from right to left in this example).
Pull tight and secure end with clip.
5. Strand 3 – The elastic secured with yellow clip will now form Strand 3. AS the end of this elastic is too short, you will need to move the beads, button and watch face along to give it more length (you need enough enough elastic for the beads and to tie it off in Step 7).
Remove yellow clip and thread Strand 3 with beads. Check it is the same length as Strands 1 and 2.
Pull Strand 3 tight and hold in place with yellow clip.
6. Strand 4 – Remove green clip; this will be Strand 4. Thread with beads until the same length as the other strands. Thread through the button the opposite way to Strand 3.
7. Remove both clips. Pull ends tight and knot at the shank button. Do not trim ends yet.
8. Try the watch on in case any adjustments need to be made. Stretch the knot and straps so that the elastic is already tightened. Now you can trim the loose ends. You will note that the knot is now hidden on the wrist side under the button. You are now finished and this is what it looks like!


